Your road bike is your most precious possession. So it is important to clean and maintain it properly. When you come back from a ride in the rain, you know you need to give your road bike a good scrub. But even if your bike is not completely caked with mud and dirt, it still needs some love from time to time. We often don't feel like it, but if you cycle weekly, we recommend cleaning your road bike monthly. If you also go off-road with your bike, for example mountain biking, gravel or cyclocross, then you should definitely clean your bike more often, perhaps weekly.
What do you need to clean your road bike?
You need these everyday household items to clean your bike:
- Clean cleaning rags or old cotton T-shirts
- Three buckets
- Garden hose with nozzle
- Sponges
To clean your road bike, you will need these cleaning products:
- Degreaser
- Brush set
- Bike cleaner
- Brake cleaner (for disc brakes)
Optional, but recommended tools:
- Mounting stand (we recommend the one from Feedback Sports)
- Chain Keeper (This comes in two variants -> For thru axle if you have disc brakes -> For quick release if you don't have disc brakes)
The ten steps to a clean bike
Step 1: Fill your buckets
Fill three clean buckets with water. Fill one with a splash of detergent and fill another with a splash of degreaser (ratio 1:5), the last bucket is used to rinse the bike. You won't necessarily need these if you rinse the bike with a garden hose.
Step 2: Put the bike on the mounting stand
Put your bike in the mounting stand. This puts the bike at a good working height and makes it easy to clean all rotating parts. No mounting stand? Try hooking the nose of your saddle over a tight clothesline.

Step 3: Use the chain keeper
Then remove the wheels. Use the chain keeper to keep the driveline under tension. A chain keeper is not a must, but it is a very handy tool. You avoid getting tangled up with the chain
Step 4: Cleaning your road bike chain
Use a good brush and the bucket you put the degreaser in. Turn the cranks backwards so that it gets on each link. After a few minutes, rinse off with a gentle spray of garden hose or use your bucket of clean water.
PRO TIP: If the chain is still greasy, apply small drops of detergent as you would with lube, grab the chain in the rough side of your sponge and spin the cranks a few times. Rinse with a gentle spray.

Step 5: Cleaning the drive
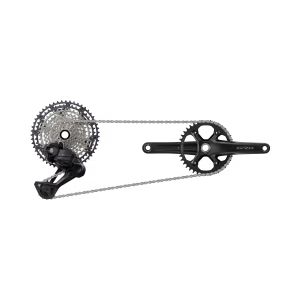
Dip a hard-bristled brush into the bucket of degreaser and scrub the chainrings. Make sure you use the right brushes so you can get to everything. It is important to get to the hard-to-reach areas between and behind the front sprockets. Rinse with a gentle stream of water and repeat if you still see dirt. Then grab your rear wheel, grab another brush with degreaser and scrub your cassette well, if you do this regularly you can make your cassette look like new every time. So all shiny and shiny. Silver, without any dark or black deposits!
Step 6: Scrubbing the frame
For the next step, use the bucket with cleaning solution. Dip a clean, soft sponge into the bucket. Soap the frame, working from front to back and top to bottom. Areas that are often forgotten are the handlebars, the underside of the top tube, the underside of the bottom bracket and the inside of the fork. Rinse the frame again with a gentle spray from the garden hose or use the bucket of clean water.
Step 7: Don't forget the wheels!
We recommend using a soft, large brush to clean the tyres and rims, so you can get into every nook and cranny with minimal effort. Dip your brush into the bucket of detergent. Start at the valve then you'll know when you've been all the way around. Also grab the spokes and the hub, this is also where a lot of dirt accumulates. Don't forget to clean both sides!
Step 8: Avoid squeaky (disc) brakes
If you have disc brakes, make sure you clean them with brake cleaner. This does not have to be done every time, but if you notice your brakes starting to squeak, it is wise to clean them. Spray brake cleaner on the a clean, dry cloth and clean the brake disc. Do this on both sides, even if sometimes you can't reach them very well. Let it soak in and, after a minute, wipe the disc again with a clean cloth. This prevents squeaking is better for the life of your brake pads.
Step 9: Dry your bike thoroughly
Put the wheels back in your frame and turn the cranks to check that the drivetrain is running smoothly. Grab a dry cloth (we use an old towel for this) and dry your frame and wheels. Take an old rag, clamp it around the chain and give a few cranks to make the chain as dry as possible. If the weather is nice we always leave the bike for a while to let it dry outdoors, if it rains we do the rest inside the shed.
Step 10: Lubrication can be learned
Finally, we lubricate the chain. We are fans of wax lube. Wax lube soaks in well, attracts no/little dirt, lasts a long time and you can use it all year round. We drop a very small drop of wax lube on about half the links and then turn the cranks, the lube distributes itself through the drivetrain. Leave it on for a few minutes and then wipe the chain one last time with a clean cloth to remove excess residue.


